
25 Best Out of Waste Ideas for Home Decor 2026: Turn Household Trash into Beautiful Pieces
25 Best Out of Waste Ideas for Home Decor 2026: Turn Household Trash into Beautiful Pieces
Published on March 19, 2026 | Reading Time: 12 minutes
Introduction: The Upcycling Revolution in India
The Indian waste management crisis demands action, and creative solutions are emerging from homes across the nation. With waste generation in urban Indian households at 0.5 kg per capita per day, finding innovative ways to repurpose household items has become essential. The Navi Mumbai waste management initiatives encourage residents to adopt the 3R principle: Reduce, Reuse, and Recycle.
Upcycling transforms ordinary household waste into extraordinary home decor pieces. This movement is not just environmentally responsible but also economically smart. By converting items destined for landfills into functional and beautiful home accessories, you can save thousands of rupees annually while contributing to India’s environmental sustainability goals.
Whether you are a creative DIY enthusiast or someone looking to add artistic touches to your home, these 25 out of waste ideas offer practical solutions. Each project requires minimal investment, basic tools, and creative thinking.
Glass Bottles and Jars: Transform Clear Waste into Elegant Pieces
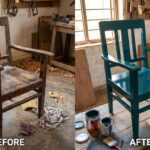
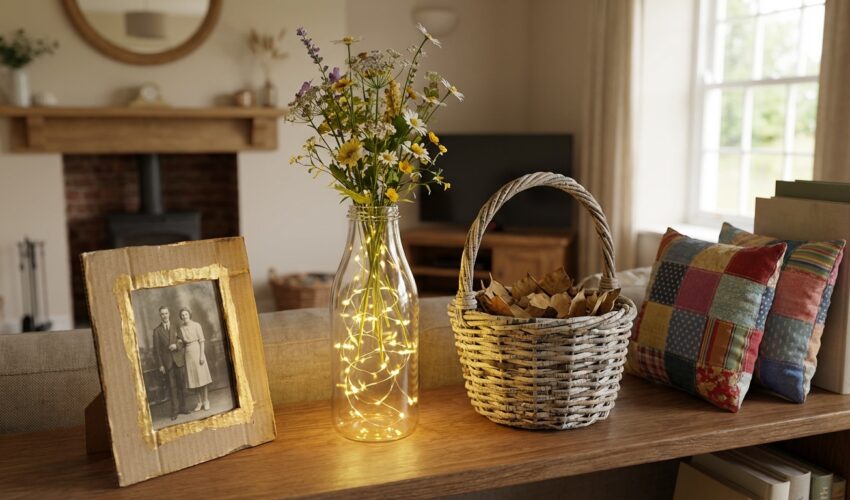
1. Painted Glass Bottle Vases with Floral Designs
Transform clear glass bottles into artistic vases with vibrant hand-painted designs. These become eye-catching centerpieces for dining tables, shelves, or window sills.
- Empty glass bottles of varying sizes
- Acrylic paint in multiple colors
- Fine brushes for detailed work
- Clear gloss sealer spray
- Newspaper or craft paper for base
- Clean the bottles thoroughly and dry completely
- Sketch your design lightly with pencil or paint pen
- Paint your design with acrylic paint, allowing each color to dry before adding the next
- Apply two coats of gloss sealer for protection and shine
2. Glass Jar Hanging Pendant Lamps
Create elegant hanging lights from old glass jars. Perfect for corridors, bedrooms, or creating ambient lighting in living rooms during evenings.
- Clear glass jars or bottles
- Pendant light fixture kit (basic electrical)
- Wire or rope for hanging
- Decorative beads or paint for customization
- LED bulb
- Install the light fixture through the jar opening following kit instructions
- Decorate the jar with paint or wrap decorative elements around it
- Attach hanging wire or rope securely to the jar neck
- Install the LED bulb and test before hanging
3. Decorative Glass Bottle Spice Storage System
Organize your kitchen spices in attractive glass bottles with labeled cork or metal lids. This system saves space and looks beautiful on kitchen shelves.
- Small glass bottles with lids
- Adhesive labels or kraft paper
- Black ink pen for labeling
- Cork or wooden lids if needed
- Wooden shelf or rack
- Clean and dry all glass bottles completely
- Create decorative labels with spice names
- Affix labels to bottles and fill with spices
- Arrange bottles on a shelf or rack in alphabetical order
4. Mini Glass Jar Terrariums with Succulents
Create miniature gardens inside glass jars. These low-maintenance terrariums purify air and add natural beauty to desks, shelves, and windowsills.
- Wide-mouth glass jars
- Pebbles and sand
- Potting soil
- Small succulent plants or cactus
- Decorative elements like small stones or moss
- Create a drainage layer with pebbles at the jar bottom
- Add a layer of sand, then potting soil
- Plant small succulents or cactus carefully
- Add decorative moss or stones on top
5. Frosted Glass Jar Candle Holders
Create elegant candle holders using frosted glass jars. These are perfect for creating a romantic atmosphere in bedrooms or living areas.
- Clear glass jars
- Frosted glass spray paint
- Decorative string or ribbon
- Tea light candles or pillar candles
- Small pebbles for decoration
- Apply frosted glass spray paint to the exterior of jars
- Allow paint to dry completely
- Tie decorative string or ribbon around the neck
- Place candles inside and arrange pebbles at the bottom
Old Newspapers and Magazines: Create Art from Print
6. Rolled Newspaper Wall Art and Decorative Panels
Roll newspaper strips and arrange them into abstract or geometric wall art. These pieces add texture and visual interest to blank walls.
- Old newspapers in various colors
- Wooden frame or cardboard backing
- Hot glue gun and glue sticks
- Scissors or craft knife
- Clear varnish for protection
- Cut newspaper into uniform strips about 2cm wide
- Roll strips tightly and secure with glue
- Arrange rolled tubes in patterns on your backing
- Glue each roll in place and apply varnish for durability
7. Newspaper Paper Baskets and Storage Organizers
Weave newspaper strips into sturdy baskets for storing small items, accessories, or decorative display on shelves.
- Old newspapers
- Scissors
- Glue stick
- Cardboard base
- Decorative paper for finishing
- Cut newspaper into long strips of uniform width
- Weave strips vertically and horizontally on cardboard base
- Glue strips together as they intersect
- Reinforce edges with decorative paper
8. Magazine Coasters and Table Decorations
Create colorful coasters by layering, rolling, or folding magazine pages. These protect furniture while adding visual appeal.
- Old magazines with colored pages
- Scissors
- Glue or mod podge
- Clear sealant spray
- Cork or felt backing
- Cut magazine pages into square shapes
- Layer and glue colorful pages to create coasters
- Seal with varnish for water resistance
- Attach cork backing to prevent scratching furniture
9. Newspaper Gift Wrapping Paper with Stamped Designs
Convert newspaper into attractive gift wrap by stamping designs or adding artistic touches. Eco-friendly and personal gift presentation.
- Newspaper sheets
- Acrylic paint
- Stamps or DIY stamp materials
- Twine or decorative string
- Dried flowers or leaves for embellishment
- Choose newspaper pages with attractive layouts
- Stamp or paint decorative patterns across the paper
- Allow paint to dry completely
- Wrap gifts and tie with twine and natural embellishments
10. Papier Mache Decorative Bowls and Masks
Create stunning three-dimensional pieces using papier mache technique with newspaper. Perfect for wall displays or functional decorative bowls.
- Newspaper strips
- Flour and water paste or commercial papier mache paste
- Balloon or mold for shaping
- Acrylic paint
- Varnish for finishing
- Prepare paste mixture and tear newspaper into strips
- Layer newspaper strips on mold, alternating with paste
- Allow to dry completely for 24-48 hours
- Paint and varnish your finished piece
Cardboard and Packaging Boxes: Functional Home Organization
11. Decorated Cardboard Drawer Organizers
Create custom drawer dividers from cardboard to organize accessories, utensils, and small items neatly.
- Sturdy cardboard sheets
- Fabric or decorative paper
- Scissors and cutter
- Glue or double-sided tape
- Ruler and measuring tape
- Measure drawer dimensions and plan compartment sizes
- Cut cardboard pieces and score lines for folding
- Cover with fabric or decorative paper
- Assemble and glue into drawer configuration
12. Cardboard Wall Shelves and Floating Displays
Build lightweight wall shelves from reinforced cardboard. Perfect for displaying books, plants, or decorative items without drilling.
- Strong cardboard or corrugated board
- Wood adhesive
- Paint or decorative wallpaper
- Mounting brackets or heavy-duty wall tape
- Supports for underneath
- Cut cardboard to desired shelf length and width
- Reinforce edges and base with multiple layers
- Paint or cover with decorative material
- Mount securely with brackets or adhesive tape
13. Cardboard Building Toys and Activity Centers for Kids
Create engaging toys and play structures from cardboard boxes. Educational and entertaining while keeping children busy with creative play.
- Large cardboard boxes
- Box cutter or craft knife
- Acrylic paint
- Markers for details
- Tape and glue for assembly
- Plan your toy design: playhouse, car, fort, or castle
- Cut windows, doors, and openings carefully
- Decorate with paint and markers
- Assemble securely and add interior elements
14. Cardboard Photo Frames with Embellishments
Design beautiful photo frames using cardboard backing and decorative materials. Perfect for displaying family memories affordably.
- Cardboard sheets
- Decorative paper or fabric
- Embellishments: beads, sequins, dried flowers
- Glue and double-sided tape
- Glass or clear plastic sheet
- Cut cardboard to frame dimensions with window opening
- Cover with decorative paper or fabric
- Attach glass sheet in front
- Embellish edges with beads, sequins, or other materials
15. Cardboard Tube Planters for Small Plants
Transform cardboard tubes from paper rolls into eco-friendly planters. Great for succulents, seedlings, or small herbs.
- Paper towel or toilet paper tubes
- Potting soil
- Small plants or seeds
- Paint or decorative paper
- Plastic bag lining
- Line cardboard tube with plastic bag to prevent moisture loss
- Decorate tube exterior with paint or paper
- Fill with potting soil
- Plant seeds or small plants and water appropriately
Old Fabric, Clothes, and Sarees: Textile Transformations
16. Patchwork Cushion Covers from Old Clothes
Create colorful cushion covers by piecing together fabric scraps from old clothes and sarees in patchwork patterns.
- Old fabrics and clothing pieces
- Needle and thread or sewing machine
- Scissors
- Cushion filler or old cushion
- Matching fabric for backing
- Cut fabric scraps into uniform squares or geometric shapes
- Arrange pieces in a pleasing pattern
- Sew pieces together to create front panel
- Stitch backing fabric and fill with cushion material
17. Braided Fabric Rugs and Floor Mats
Braid strips of old fabric to create sturdy, decorative floor rugs that add color and texture to any room.
- Old clothes and fabric scraps
- Scissors
- Needle and strong thread
- Rolling mat for shaping
- Fabric paint for edging
- Cut fabric into long strips of equal width
- Braid three or more strips together tightly
- Coil braided strips into circular or rectangular rug shape
- Stitch coils together securely and finish edges
18. Fabric Scrap Tote Bags and Carry Bags
Sew practical tote bags from fabric scraps. Perfect for shopping, carrying items, or gifting to friends.
- Old fabric pieces
- Sewing machine or needle and thread
- Scissors
- Rope or fabric strips for handles
- Buttons for decoration
- Cut fabric pieces to bag dimensions
- Sew sides and bottom with right sides together
- Attach handles securely
- Add pockets or decorative elements as desired
19. Fabric Wall Hangings from Sarees and Textiles
Display beautiful sarees and traditional fabrics as wall art. This celebrates cultural heritage while creating stunning focal points.
- Old sarees or decorative fabrics
- Wooden rod or bamboo pole
- String or rope for hanging
- Picture hooks
- Optional: frame for formal presentation
- Choose saree or fabric in good condition
- Attach rod to top edge using pocket sewing or rings
- Hang rod with string securely on wall hooks
- Steam or press fabric to display its beauty
20. Fabric Scrap Pot Holders and Kitchen Cloth Sets
Create functional and beautiful pot holders and kitchen cloths from quilted fabric scraps.
- Fabric scraps
- Batting or insulating material
- Needle and thread or sewing machine
- Scissors
- Binding tape for finishing edges
- Cut fabric and batting into pot holder size
- Layer fabric and batting together
- Quilt layers with decorative stitching
- Bind edges with bias tape and add hanging loop
Kitchen Waste and Containers: From Trash to Treasure
21. Painted Tin Can Planters for Herbs and Flowers
Transform tin cans into attractive planters for herbs, succulents, or small flowering plants for kitchen windowsills and gardens.
- Clean tin cans of various sizes
- Acrylic paint in multiple colors
- Potting soil
- Small plants, seeds, or herbs
- Drainage holes
- Drill or punch drainage holes in can bottoms
- Paint cans with acrylic paint in desired colors and patterns
- Allow paint to dry completely
- Fill with soil and plant herbs or flowers
22. Coconut Shell Art and Planters
Create unique planters and decorative pieces from coconut shell halves. These natural containers add tropical charm to indoor and outdoor spaces.
- Coconut shells, cleaned and halved
- Potting soil
- Small plants
- Paint or stain for finishing
- Rope or twine for hanging
- Clean coconut shells thoroughly and let dry
- Drill drainage holes if needed
- Paint or stain exteriors for decoration
- Fill with soil and plants, or leave natural for rustic appeal
23. Kitchen Waste Composting System for Home Gardens
Create an effective composting system using kitchen waste containers. This produces rich soil for gardening while reducing household waste.
- Large containers or old bins
- Drill for ventilation holes
- Kitchen waste: vegetable scraps, fruit peels, coffee grounds
- Dry leaves and cardboard
- Soil or compost starter
- Drill ventilation holes in container bottom and sides
- Layer dry materials, kitchen waste, and soil alternately
- Maintain moisture balance by adding water occasionally
- Turn compost monthly and harvest rich soil in 3-4 months
24. Egg Carton Seed Starters and Planting Pots
Use egg cartons as biodegradable seed starters. These can be planted directly into soil as seedlings grow.
- Empty cardboard egg cartons
- Potting soil or seed compost
- Seeds for vegetables or flowers
- Tray to hold cartons
- Spray bottle for watering
- Fill each egg cup with potting soil
- Plant one seed per compartment
- Water gently and place in sunny location
- Transplant seedlings with carton directly into soil when ready
25. Plastic Bottle Vertical Gardens and Hanging Systems
Create space-saving vertical gardens using stacked plastic bottles. Perfect for balconies, small patios, or apartment gardening.
- Clean plastic bottles
- Drill for hole making
- Potting soil
- Plants or herbs
- Rope or wooden frame for support
- Cut side holes in plastic bottles for planting openings
- Drill drainage holes at bottle bottoms
- Stack bottles using rope or frame supports
- Fill with soil through top opening and plant herbs or vegetables
Tools You Will Need
These basic tools will help you complete most out of waste projects. You likely have many of these items already at home:
Why Upcycling Saves You Money: Cost Comparison Table
Here is a practical comparison showing how much you can save by making home decor from waste materials instead of purchasing new items:
| Item | Buying New (Approx Price in INR) | Making from Waste (Approx Cost) | Savings |
|---|---|---|---|
| Painted Glass Vase | 800 to 1500 | 50 to 100 | 1300 to 1450 |
| Pendant Light Fixture | 2000 to 3500 | 300 to 500 | 1500 to 3200 |
| Decorative Cushion Cover | 600 to 1200 | 50 to 150 | 450 to 1150 |
| Woven Basket | 800 to 1500 | 40 to 80 | 720 to 1460 |
| Fabric Rug (2×3 feet) | 2500 to 4000 | 100 to 200 | 2300 to 3900 |
| Herb Planter Set | 1200 to 2000 | 80 to 150 | 1050 to 1920 |
| Photo Frames (set of 5) | 1500 to 2500 | 100 to 200 | 1300 to 2400 |
| Drawer Organizer Set | 1000 to 1800 | 60 to 120 | 880 to 1740 |
| Wall Shelves (pair) | 1500 to 2800 | 200 to 400 | 1100 to 2600 |
| Composite Coasters (set of 6) | 400 to 800 | 30 to 60 | 340 to 770 |
Total Average Savings: INR 10,000 to 20,000 when creating 10 different items from waste materials instead of purchasing them new. Multiply these savings across a full year of creative projects, and upcycling becomes an investment in both your wallet and the environment.
Frequently Asked Questions
Conclusion: Start Your Upcycling Journey Today
The 25 out of waste ideas presented in this guide demonstrate that household trash is not waste but potential. Every bottle, newspaper, fabric scrap, and cardboard box holds the promise of beautiful home decor. By engaging in these creative projects, you contribute to India’s waste management goals while creating unique, personalized pieces for your home.
Upcycling is more than a cost-saving strategy. It represents a shift in how we view consumption and waste. As residents of Navi Mumbai and across India, we face growing waste challenges. Individual actions matter. When you choose to create from waste instead of purchasing new, you make a conscious decision to reduce your environmental footprint.
Start small with an easy project. A painted bottle vase or newspaper coasters require minimal time and materials. As your confidence grows, tackle more complex projects like fabric rugs or vertical gardens. Share your creations with friends and family. Inspire others in your community to embrace upcycling. Together, we can transform the way India manages household waste.
For more information about sustainable living practices and waste management guidelines in your area, visit navimumbai.com for community resources and environmental initiatives.